Auth Contrôleurs
- Les contrôleurs Auth vous permettent d’effectuer une authentification de base avec :
se connecter avec un compte
création de compte
déconnexion
contrôleurs avec l’authentification requise
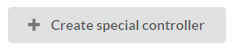
Création
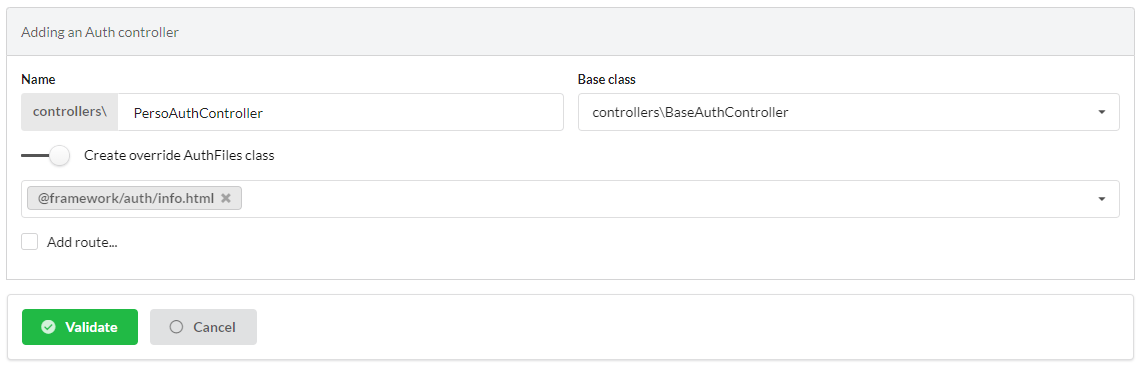
Dans l’interface d’administration (webtools), activez la partie Controllers, et choisissez de créer un Auth controller :
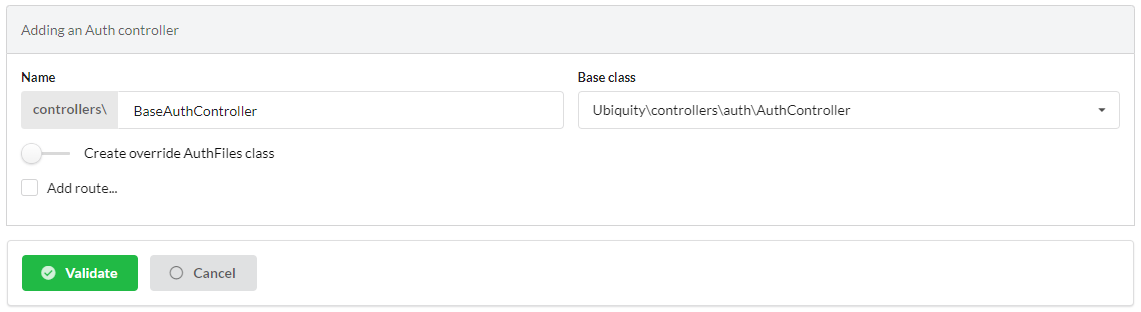
- Remplissez ensuite le formulaire :
Entrez le nom du contrôleur (BaseAuthController dans ce cas)
Le contrôleur généré :
 1 /**
 2 * Auth Controller BaseAuthController
 3 **/
 4class BaseAuthController extends \Ubiquity\controllers\auth\AuthController{
 5
 6     protected function onConnect($connected) {
 7             $urlParts=$this->getOriginalURL();
 8             USession::set($this->_getUserSessionKey(), $connected);
 9             if(isset($urlParts)){
10                     Startup::forward(implode("/",$urlParts));
11             }else{
12                     //TODO
13                     //Forwarding to the default controller/action
14             }
15     }
16
17     protected function _connect() {
18             if(URequest::isPost()){
19                     $email=URequest::post($this->_getLoginInputName());
20                     $password=URequest::post($this->_getPasswordInputName());
21                     //TODO
22                     //Loading from the database the user corresponding to the parameters
23                     //Checking user creditentials
24                     //Returning the user
25             }
26             return;
27     }
28
29     /**
30      * {@inheritDoc}
31      * @see \Ubiquity\controllers\auth\AuthController::isValidUser()
32      */
33     public function _isValidUser($action=null): bool {
34             return USession::exists($this->_getUserSessionKey());
35     }
36
37     public function _getBaseRoute(): string {
38             return 'BaseAuthController';
39     }
40}
Implémentation de l’authentification
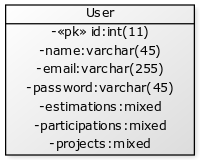
Exemple d’implémentation avec l’interface d’administration : Nous allons ajouter un contrôle d’authentification sur l’interface d’administration.
L’authentification est basée sur la vérification du couple email/password sur le modèle User :
Modification de BaseAuthController
 1 /**
 2 * Auth Controller BaseAuthController
 3 **/
 4class BaseAuthController extends \Ubiquity\controllers\auth\AuthController{
 5
 6     protected function onConnect($connected) {
 7             $urlParts=$this->getOriginalURL();
 8             USession::set($this->_getUserSessionKey(), $connected);
 9             if(isset($urlParts)){
10                     Startup::forward(implode("/",$urlParts));
11             }else{
12                     Startup::forward("admin");
13             }
14     }
15
16     protected function _connect() {
17             if(URequest::isPost()){
18                     $email=URequest::post($this->_getLoginInputName());
19                     $password=URequest::post($this->_getPasswordInputName());
20                     return DAO::uGetOne(User::class, "email=? and password= ?",false,[$email,$password]);
21             }
22             return;
23     }
24
25     /**
26      * {@inheritDoc}
27      * @see \Ubiquity\controllers\auth\AuthController::isValidUser()
28      */
29     public function _isValidUser($action=null): bool {
30             return USession::exists($this->_getUserSessionKey());
31     }
32
33     public function _getBaseRoute(): string {
34             return 'BaseAuthController';
35     }
36     /**
37      * {@inheritDoc}
38      * @see \Ubiquity\controllers\auth\AuthController::_getLoginInputName()
39      */
40     public function _getLoginInputName(): string {
41             return "email";
42     }
43}
Modification du contrôleur Admin
Modifiez le contrôleur d’administration pour utiliser BaseAuthController :
1class Admin extends UbiquityMyAdminBaseController{
2     use WithAuthTrait;
3     protected function getAuthController(): AuthController {
4             return $this->_auth ??= new BaseAuthController($this);
5     }
6}
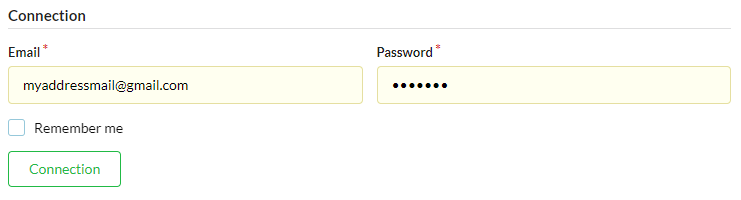
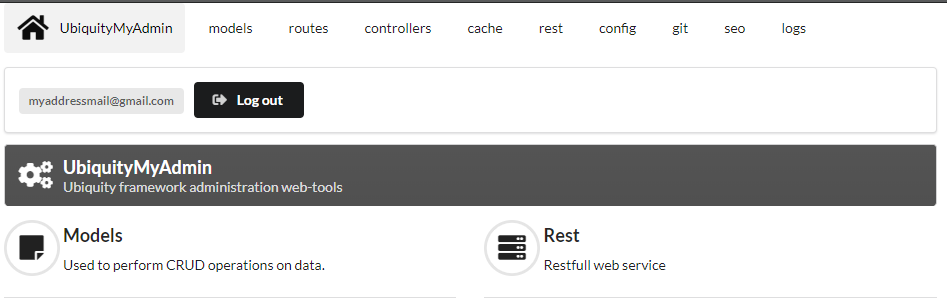
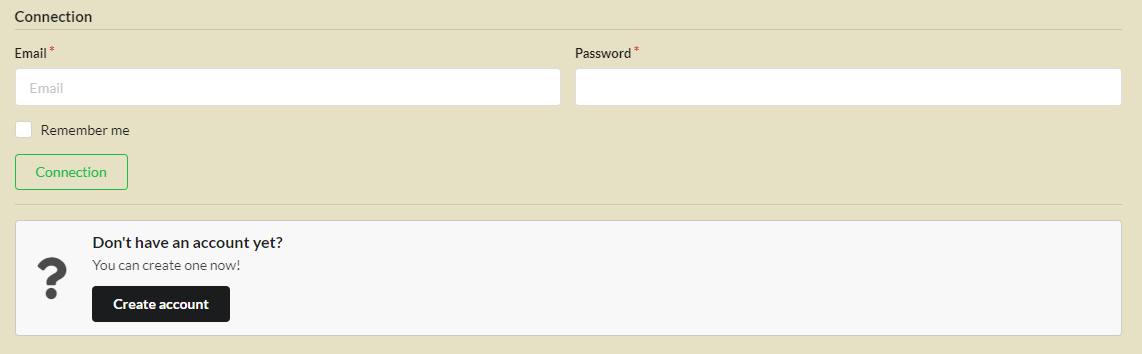
Tester l’interface d’administration à l’adresse /admin:

Après avoir cliqué sur login :
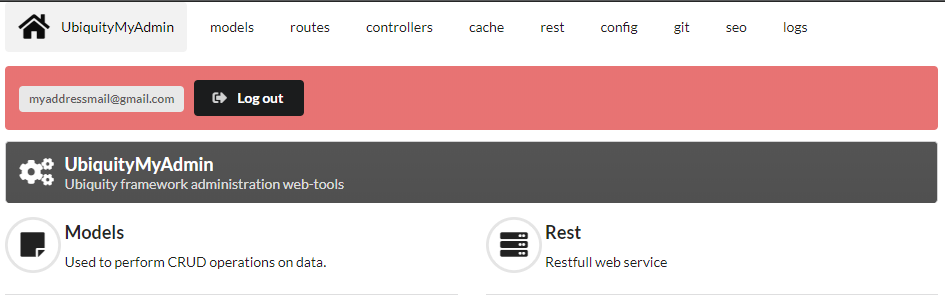
Si les données d’authentification sont invalides :

Si les données d’authentification sont valides :
Attachement de la zone info-user
Modifier le contrôleur BaseAuthController :
1 /**
2 * Auth Controller BaseAuthController
3 **/
4class BaseAuthController extends \Ubiquity\controllers\auth\AuthController{
5...
6     public function _displayInfoAsString(): bool {
7             return true;
8     }
9}
La zone _userInfo est désormais présente sur toutes les pages de l’administration :

Elle peut être affichée dans n’importe quelle vue twig :
{{ _userInfo | raw }}
Description des caractéristiques
Personnalisation des templates
template index.html
Le template index.html gère la connexion :
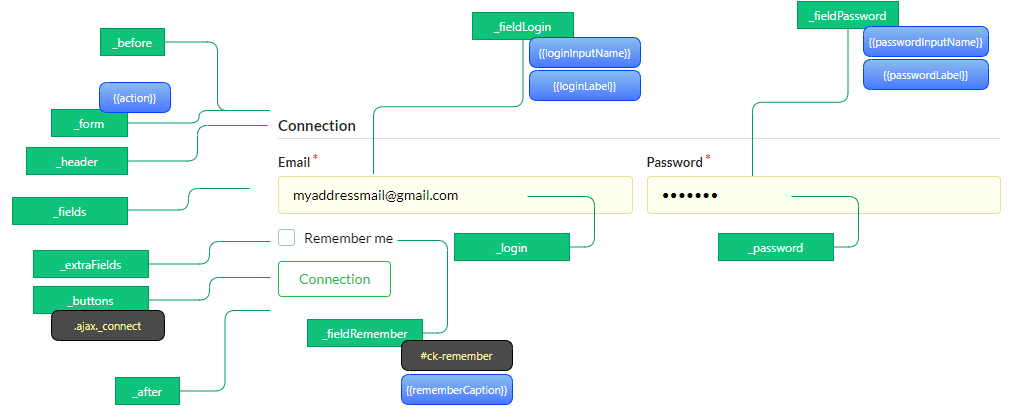
Exemple avec la zone _userInfo :
Créez un nouveau AuthController nommé PersoAuthController :
Modifiez le template app/views/PersoAuthController/info.html.
 1{% extends "@framework/auth/info.html" %}
 2{% block _before %}
 3     <div class="ui tertiary inverted red segment">
 4{% endblock %}
 5{% block _userInfo %}
 6     {{ parent() }}
 7{% endblock %}
 8{% block _logoutButton %}
 9     {{ parent() }}
10{% endblock %}
11{% block _logoutCaption %}
12     {{ parent() }}
13{% endblock %}
14{% block _loginButton %}
15     {{ parent() }}
16{% endblock %}
17{% block _loginCaption %}
18     {{ parent() }}
19{% endblock %}
20{% block _after %}
21             </div>
22{% endblock %}
Changez le contrôleur AuthController Admin :
1class Admin extends UbiquityMyAdminBaseController{
2     use WithAuthTrait;
3     protected function getAuthController(): AuthController {
4             return $this->_auth ??= new PersoAuthController($this);
5     }
6}
Personnalisation des messages
 1class PersoAuthController extends \controllers\BaseAuth{
 2...
 3 /**
 4  * {@inheritDoc}
 5  * @see \Ubiquity\controllers\auth\AuthController::badLoginMessage()
 6  */
 7 protected function badLoginMessage(\Ubiquity\utils\flash\FlashMessage $fMessage) {
 8     $fMessage->setTitle("Erreur d'authentification");
 9     $fMessage->setContent("Login ou mot de passe incorrects !");
10     $this->_setLoginCaption("Essayer à nouveau");
11
12 }
13...
14}
Auto-vérification
 1class PersoAuthController extends \controllers\BaseAuth{
 2...
 3 /**
 4  * {@inheritDoc}
 5  * @see \Ubiquity\controllers\auth\AuthController::_checkConnectionTimeout()
 6  */
 7 public function _checkConnectionTimeout() {
 8     return 10000;
 9 }
10...
11}
Limitation du nombre de tentatives
 1class PersoAuthController extends \controllers\BaseAuth{
 2...
 3 /**
 4  * {@inheritDoc}
 5  * @see \Ubiquity\controllers\auth\AuthController::attemptsNumber()
 6  */
 7 protected function attemptsNumber(): int {
 8     return 3;
 9 }
10...
11}
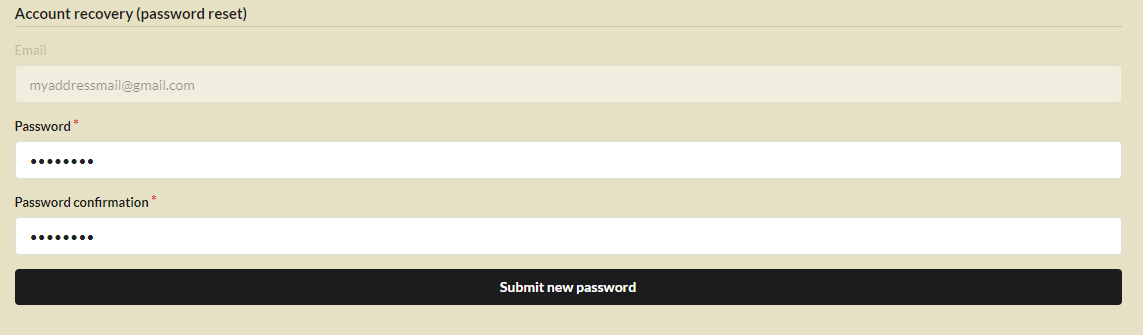
Récupération de compte
La récupération de compte se fait en réinitialisant le mot de passe du compte.
Un e-mail de réinitialisation du mot de passe est envoyé, à une adresse e-mail correspondant à un compte actif.

 1class PersoAuthController extends \controllers\BaseAuth{
 2...
 3 protected function hasAccountRecovery():bool{
 4     return true;
 5 }
 6
 7 protected function _sendEmailAccountRecovery(string $email,string $validationURL,string $expire):bool {
 8     MailerManager::start();
 9     $mail=new AuthAccountRecoveryMail();
10     $mail->to($connected->getEmail());
11     $mail->setUrl($validationURL);
12     $mail->setExpire($expire);
13     return MailerManager::send($mail);
14 }
15
16 protected function passwordResetAction(string $email,string $newPasswordHash):bool {
17     //To implement for modifying the user password
18 }
19
20 protected function isValidEmailForRecovery(string $email):bool {
21     //To implement: return true if a valid account match with this email
22 }
23}
Note
Par défaut, le lien ne peut être utilisé que sur la même machine, dans une période de temps prédéterminée (qui peut être modifiée en surchargeant la méthode accountRecoveryDuration).
Activation de MFA/2FA
L’authentification multi-facteurs peut être activée de manière conditionnelle, sur la base des informations de l’utilisateur préalablement connecté.
Note
La phase 2 de l’authentification est réalisée dans l’exemple ci-dessous en envoyant un code aléatoire par email. La classe AuthMailerClass est disponible dans le paquet Ubiquity-mailer.
 1class PersoAuthController extends \controllers\BaseAuth{
 2...
 3 /**
 4  * {@inheritDoc}
 5  * @see \Ubiquity\controllers\auth\AuthController::has2FA()
 6  */
 7 protected function has2FA($accountValue=null):bool{
 8     return true;
 9 }
10
11 protected function _send2FACode(string $code, $connected):void {
12     MailerManager::start();
13     $mail=new AuthMailerClass();
14     $mail->to($connected->getEmail());
15     $mail->setCode($code);
16     MailerManager::send($mail);
17 }
18...
19}

Note
Il est possible de personnaliser la création du code généré, ainsi que le préfixe utilisé. L’exemple ci-dessous est implémenté avec la bibliothèque robthree/twofactorauth.
protected function generate2FACode():string{
        $tfa=new TwoFactorAuth();
        return $tfa->createSecret();
}

protected function towFACodePrefix():string{
        return 'U-';
}
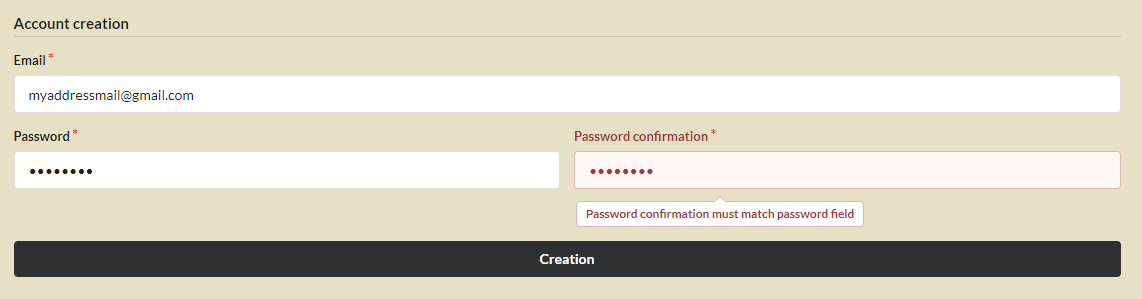
Création de compte
L’activation de la création du compte est également optionnelle :
1class PersoAuthController extends \controllers\BaseAuth{
2...
3 protected function hasAccountCreation():bool{
4     return true;
5 }
6...
7}
Dans ce cas, la méthode _create doit être surchargée afin de créer le compte :
protected function _create(string $login, string $password): ?bool {
        if(!DAO::exists(User::class,'login= ?',[$login])){
                $user=new User();
                $user->setLogin($login);
                $user->setPassword($password);
                URequest::setValuesToObject($user);//for the others params in the POST.
                return DAO::insert($user);
        }
        return false;
}
Vous pouvez vérifier la validité/disponibilité du login avant de valider le formulaire de création de compte :
protected function newAccountCreationRule(string $accountName): ?bool {
        return !DAO::exists(User::class,'login= ?',[$accountName]);
}

Une action de confirmation (vérification par courriel) peut être demandée à l’utilisateur :
protected function hasEmailValidation(): bool {
        return true;
}

protected function _sendEmailValidation(string $email,string $validationURL,string $expire):void {
        MailerManager::start();
        $mail=new AuthEmailValidationMail();
        $mail->to($connected->getEmail());
        $mail->setUrl($validationURL);
        $mail->setExpire($expire);
        MailerManager::send($mail);
}
Note
Il est possible de personnaliser ces parties en surchargeant les méthodes associées, ou en modifiant les interfaces dans les modèles concernés.